Quickstart
Getting started with your ModuleLLM Kit. Please be sure to follow the steps below in order.
Establish a connection with ModuleLLM
Warning
The following operations require an internet connection.
Please ensure that the board is connected to the router via an Ethernet cable, and that the router has enabled DHCP service.
Method 1 Serial Port (UART)
For Windows host computer
Note
Please make sure that the driver has been installed. Click here to download.
Connect the debug serial port of the Module LLM Kit in the manner shown in the image below.

Open device manager and find the serial port device.

Use the PuTTY software to connect to the serial port device. Click here to download PuTTY.

Use the ip a command to obtain the board’s IP address.

For Mac host computer
Connect the debug serial port of the Module LLM Kit in the manner shown in the image below.
Use the ls /dev/tty* command to find the serial port device.
ls /dev/tty*

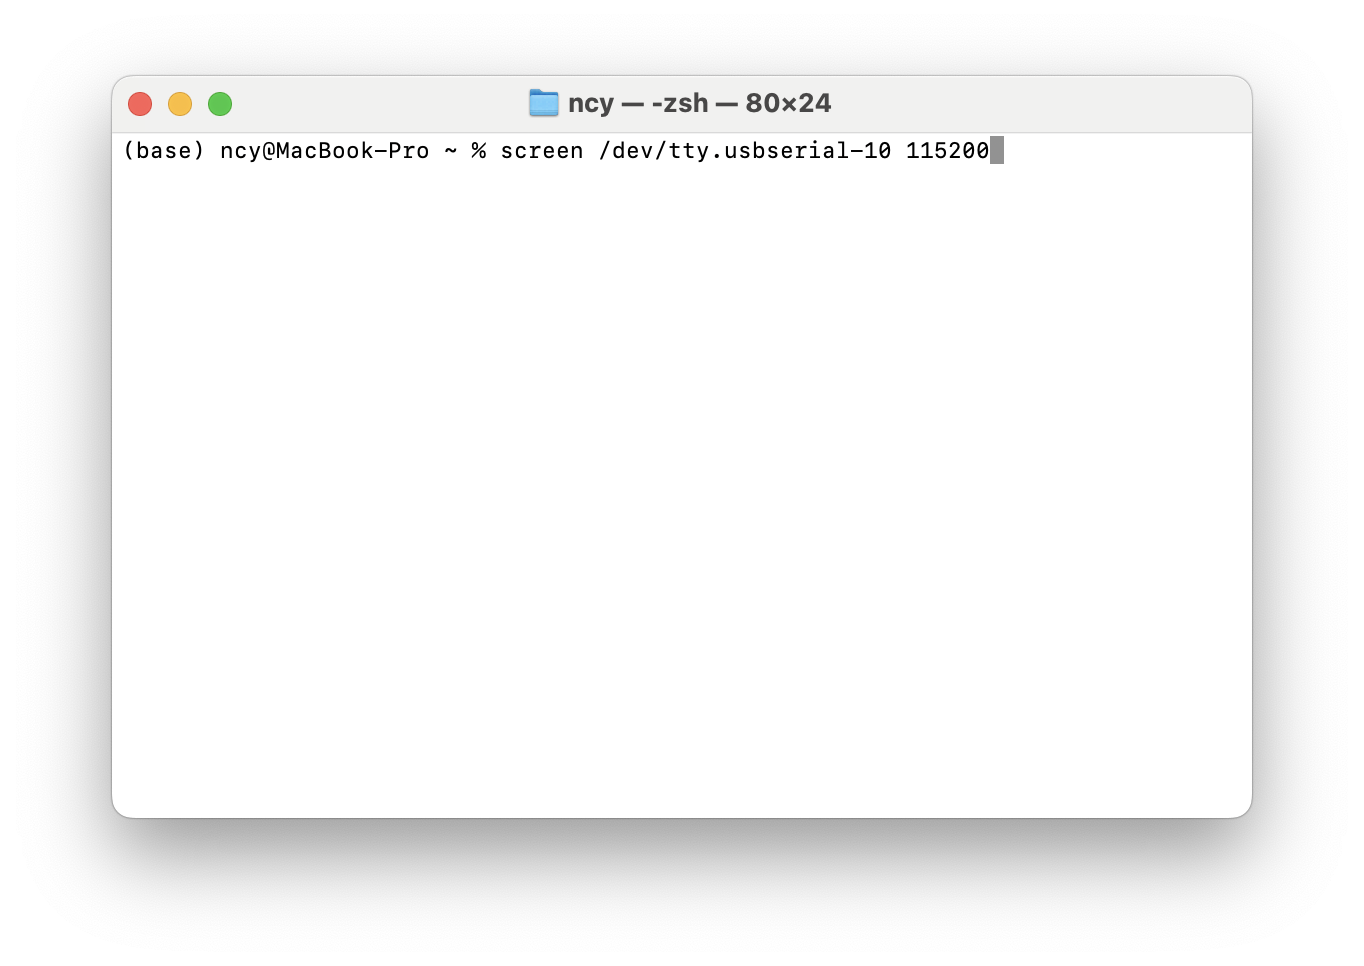
Use the screen /dev/ttyUSB0 115200 command to connect to the serial port device.
screen /dev/ttyUSB0 115200
Note
The default serial communication baud rate is 115200
The device name needs to be replaced with your board’s name.
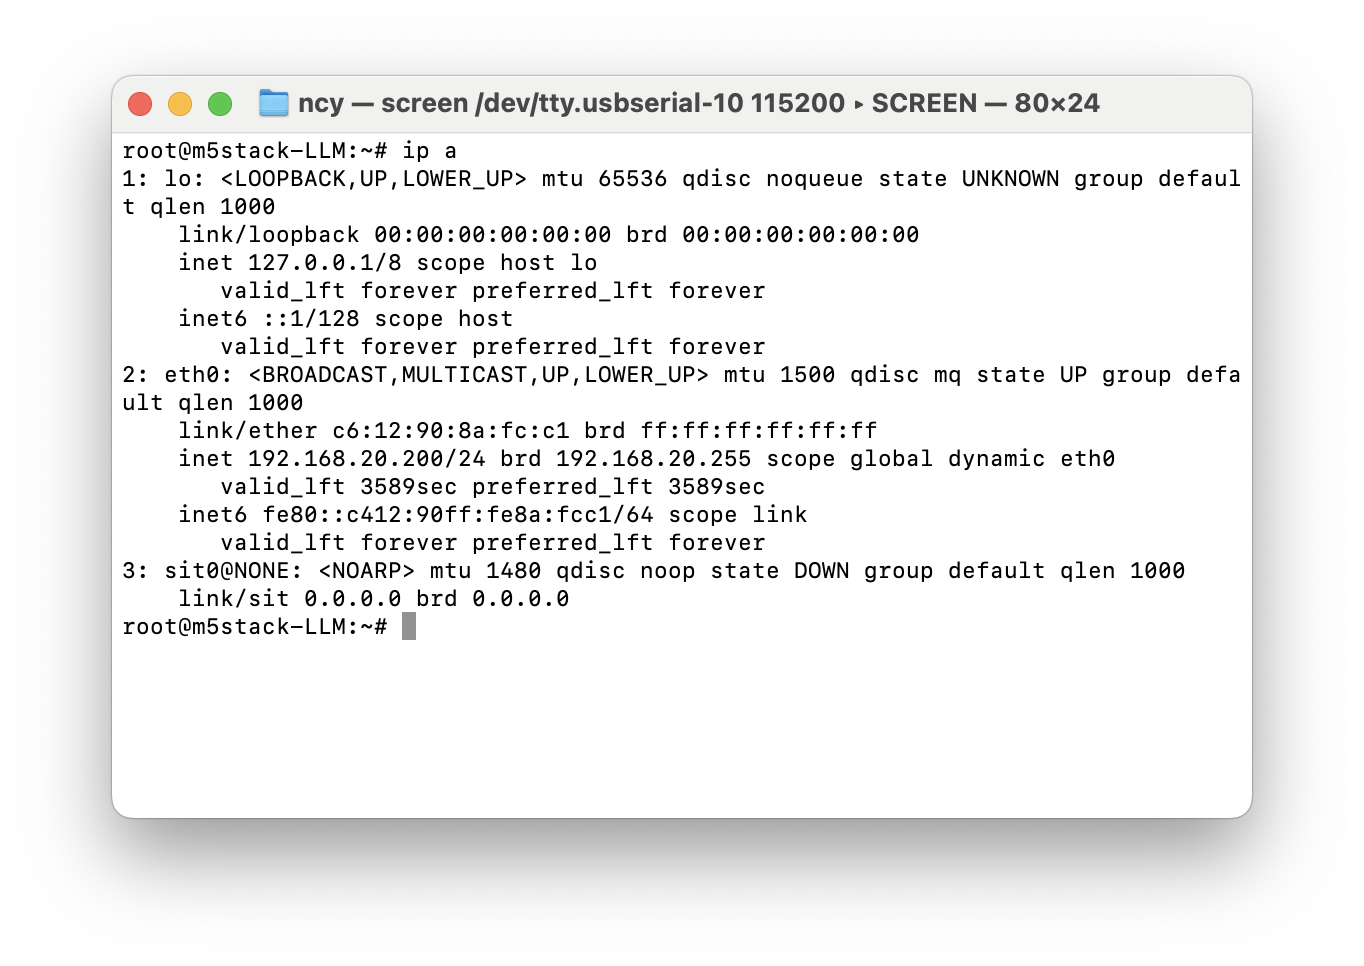
Use the ip a command to obtain the board’s IP address.
ip a
For Linux host computer
Connect the debug serial port of the Module LLM Kit in the manner shown in the image below.
Use the ls /dev/tty* command to find the serial port device.
ls /dev/tty*

Use the screen /dev/ttyUSB0 115200 command to connect to the serial port device.
screen /dev/ttyUSB0 115200
Note
The default serial communication baud rate is 115200
The device name needs to be replaced with your board’s name.

Use the ip a command to obtain the board’s IP address.
ip a

Method 2 Android Debug Bridge (ADB)
For Windows host computer
Note
If you haven’t installed ADB tools, please View the tutorial to install first.
Connect the ADB debug port of the Module LLM Kit in the manner shown in the image below.

Use the adb devices command to get the device list.
adb devices

Use the adb shell command to connect to the board.
adb shell

Use the ip a command to obtain the board’s IP address.
ip a

For Mac host computer
Note
If you haven’t installed ADB tools, please View the tutorial to install first.
Connect the ADB debug port of the Module LLM Kit in the manner shown in the image below.
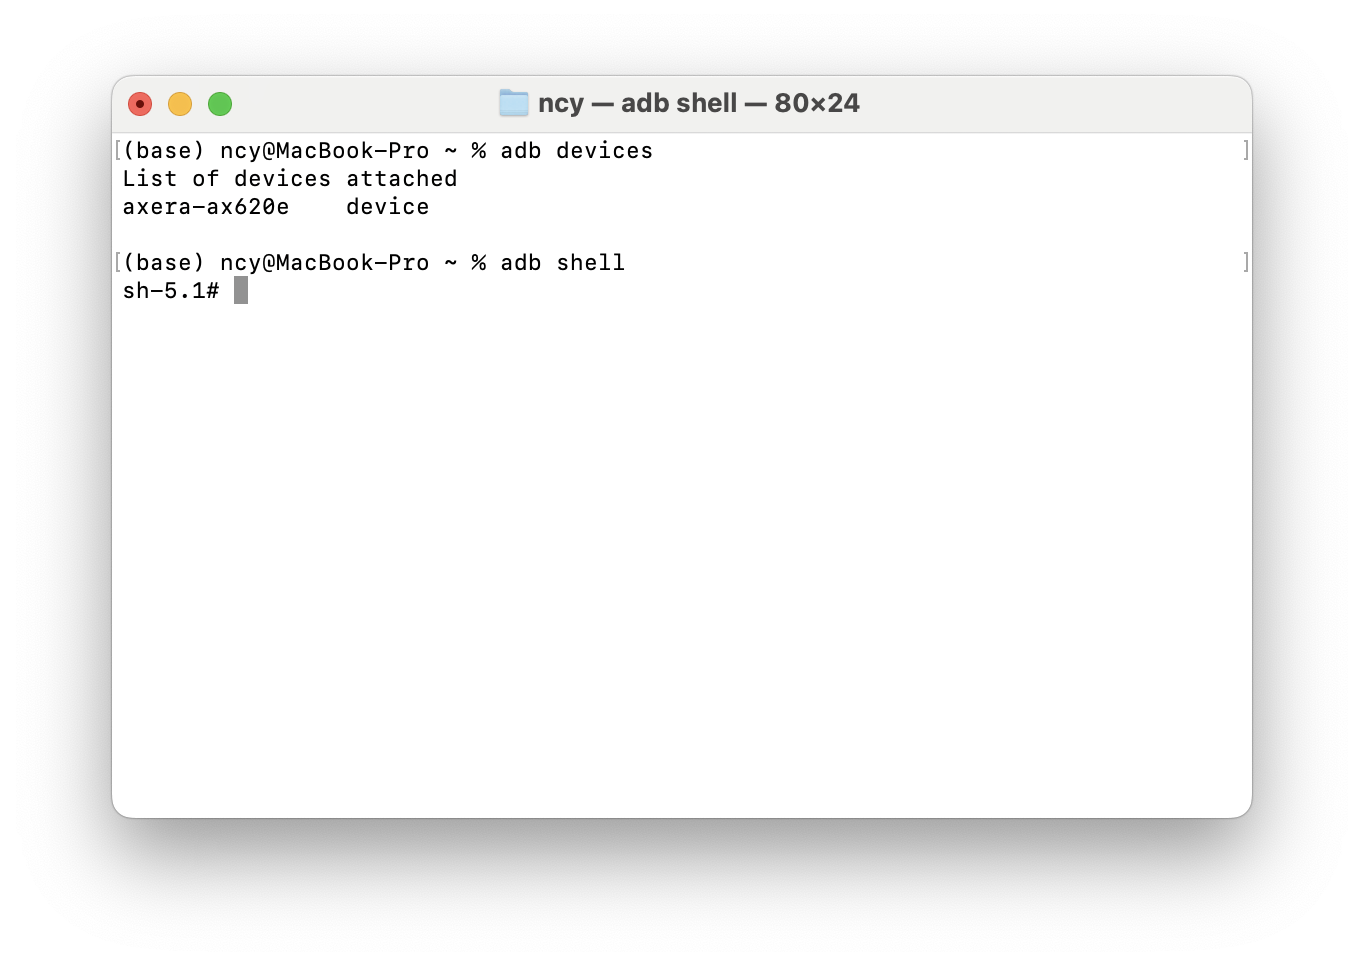
Use the adb devices command to get the device list.
adb devices

Use the adb shell command to connect to the board.
adb shell
Use the ip a command to obtain the board’s IP address.
ip a

For Linux host computer
Note
If you haven’t installed ADB tools, please View the tutorial to install first.
The first time you use it, you need to execute the following command.
sudo sh -c 'echo "SUBSYSTEM==\"usb\", ATTR{idVendor}==\"32c9\", ATTR{idProduct}==\"2003\", GROUP=\"plugdev\", MODE=\"0660\"" > /etc/udev/rules.d/51-android.rules'
sudo udevadm control --reload-rules
sudo udevadm trigger
Connect the ADB debug port of the Module LLM Kit in the manner shown in the image below.
Use the adb devices command to get the device list.
adb devices

Use the adb shell command to connect to the board.
adb shell
Note
If you have multiple devices connected, you can use the adb -s <device> shell option to specify the device.
Use the ip a command to obtain the board’s IP address.
ip a

Method 3 Secure Shell (SSH)
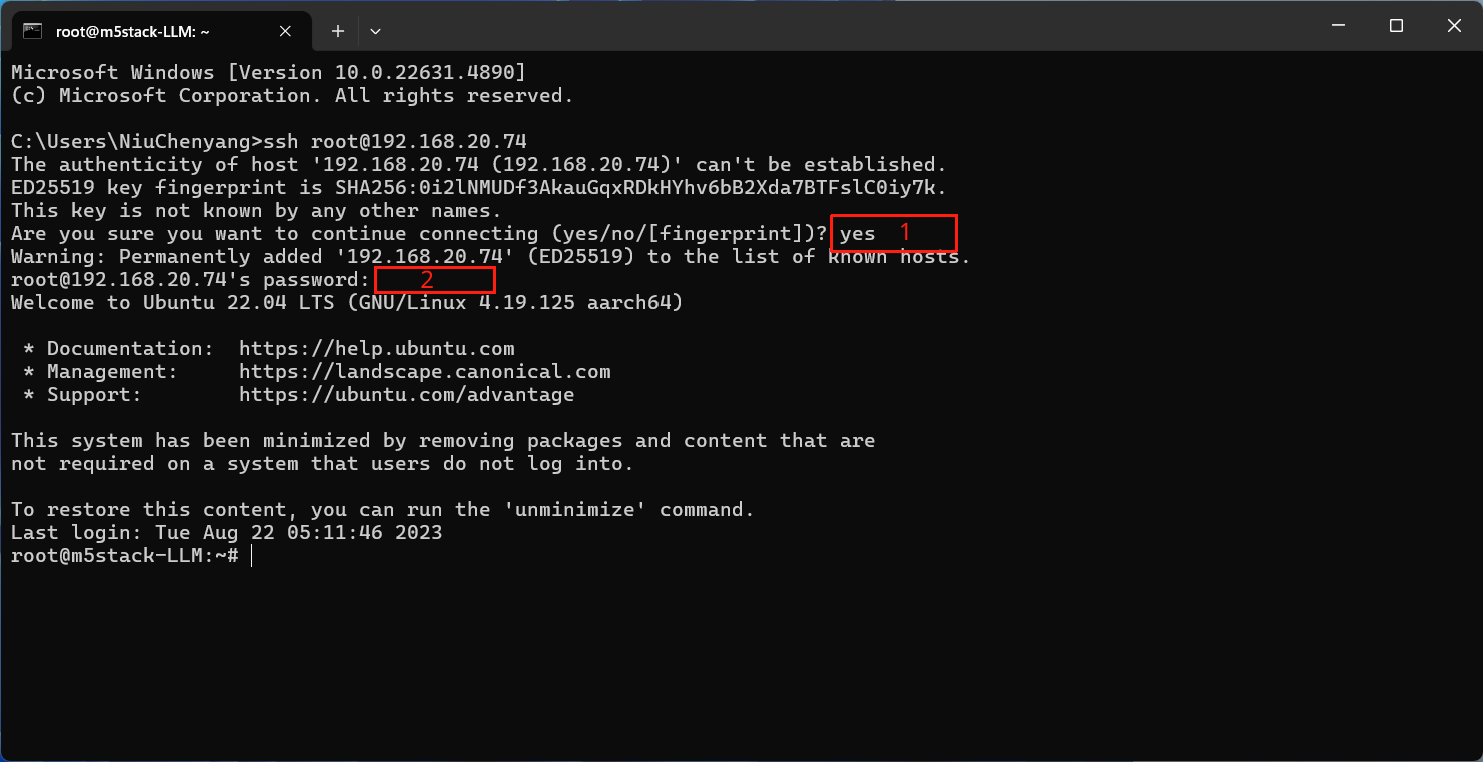
For Windows host computer
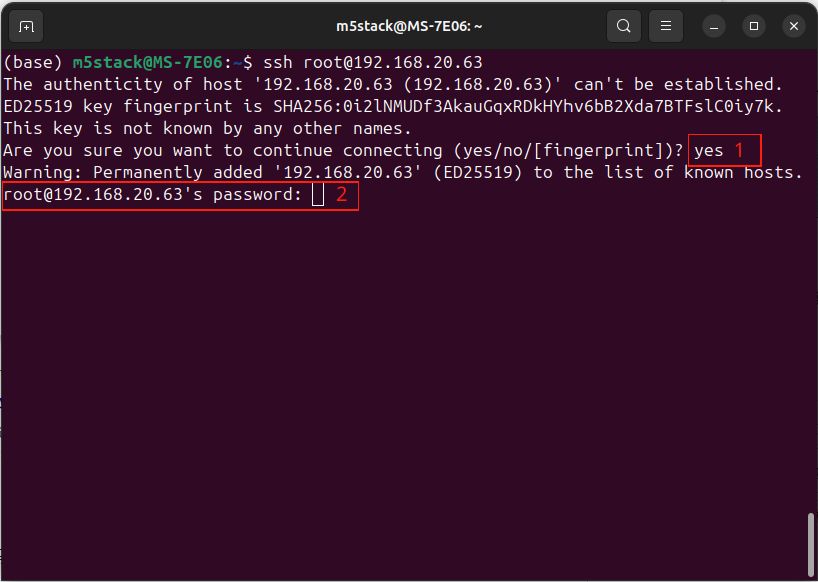
Use the ssh root@192.168.20.63 command to connect to the board.
ssh root@192.168.20.74
Note
The default password is 123456
The IP address needs to be replaced with the IP of your board.
For Mac host computer
Use the ssh root@192.168.20.63 command to connect to the board.
ssh root@192.168.20.65
Note
The default password is 123456
The IP address needs to be replaced with the IP of your board.

For Linux host computer
Use the ssh root@192.168.20.63 command to connect to the board.
ssh root@192.168.20.63
Note
The default password is 123456
The IP address needs to be replaced with the IP of your board.

Software Upgrade
Download the M5Stack apt repository key and add it to the system
Note
This step needs to be performed only once.
wget -qO /etc/apt/keyrings/StackFlow.gpg https://repo.llm.m5stack.com/m5stack-apt-repo/key/StackFlow.gpg
echo 'deb [arch=arm64 signed-by=/etc/apt/keyrings/StackFlow.gpg] https://repo.llm.m5stack.com/m5stack-apt-repo jammy ax630c' > /etc/apt/sources.list.d/StackFlow.list

Get a list of available software
apt update
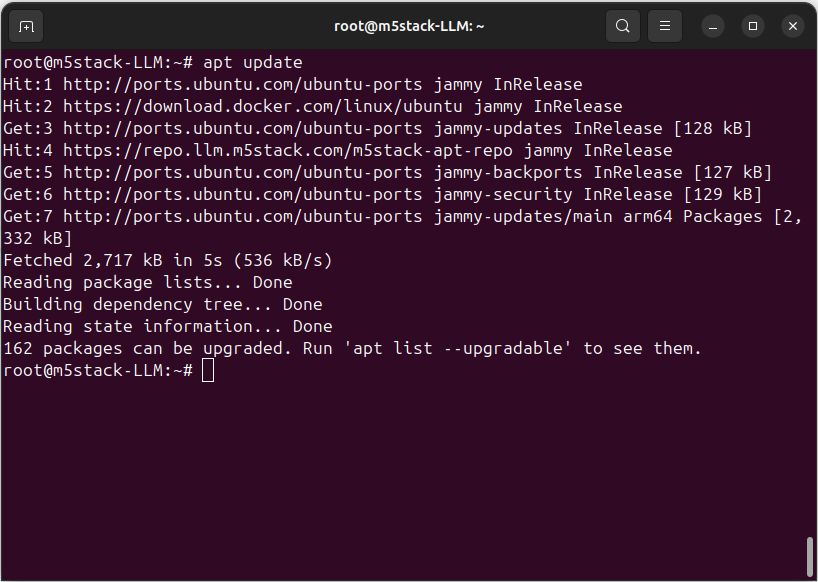
apt list | grep llm

Output list
llm-asr/stable,now 1.6 arm64 [installed]
llm-audio/stable 1.6 arm64 [upgradable from: 1.3]
llm-camera/stable 1.8 arm64 [upgradable from: 1.3]
llm-depth-anything/stable 1.6 arm64
llm-kws/stable,now 1.7 arm64 [installed]
llm-llm/stable,now 1.8 arm64 [installed]
llm-melotts-zh-cn/now 0.2 arm64 [installed,local]
llm-melotts/stable,now 1.7 arm64 [installed]
llm-openai-api/stable,now 1.7 arm64 [installed]
llm-qwen2.5-0.5b-prefill-20e/now 0.2 arm64 [installed,local]
llm-single-speaker-english-fast/now 0.2 arm64 [installed,local]
llm-single-speaker-fast/now 0.2 arm64 [installed,local]
llm-skel/stable 1.5 arm64 [upgradable from: 1.3]
llm-sys/stable,now 1.6 arm64 [installed]
llm-tts/stable 1.6 arm64 [upgradable from: 1.3]
llm-vad/stable,now 1.6 arm64 [installed]
llm-vlm/stable 1.7 arm64 [upgradable from: 1.3]
llm-whisper/stable,now 1.7 arm64 [installed]
llm-yolo/stable 1.8 arm64 [upgradable from: 1.3]
Get a list of available model
apt list | grep llm-model

Output list
llm-model-audio-en-us/stable,now 0.2 arm64 [installed]
llm-model-audio-zh-cn/stable,now 0.2 arm64 [installed]
llm-model-deepseek-r1-1.5b-ax630c/stable 0.3 arm64
llm-model-deepseek-r1-1.5b-p256-ax630c/stable 0.4 arm64
llm-model-depth-anything-ax630c/stable 0.4 arm64
llm-model-internvl2.5-1b-364-ax630c/stable 0.4 arm64
llm-model-internvl2.5-1b-ax630c/stable 0.4 arm64
llm-model-llama3.2-1b-p256-ax630c/stable 0.4 arm64
llm-model-llama3.2-1b-prefill-ax630c/stable 0.2 arm64
llm-model-melotts-en-default/stable,now 0.5 arm64 [installed]
llm-model-melotts-en-us/stable 0.5 arm64
llm-model-melotts-ja-jp/stable,now 0.5 arm64 [installed]
llm-model-melotts-zh-cn/stable 0.5 arm64
llm-model-openbuddy-llama3.2-1b-ax630c/stable 0.2 arm64
llm-model-qwen2.5-0.5b-int4-ax630c/stable 0.4 arm64
llm-model-qwen2.5-0.5b-p256-ax630c/stable 0.4 arm64
llm-model-qwen2.5-0.5b-prefill-20e/stable 0.2 arm64
llm-model-qwen2.5-1.5b-ax630c/stable 0.3 arm64
llm-model-qwen2.5-1.5b-int4-ax630c/stable 0.4 arm64
llm-model-qwen2.5-1.5b-p256-ax630c/stable 0.4 arm64
llm-model-qwen2.5-coder-0.5b-ax630c/stable 0.2 arm64
llm-model-qwen3-0.6b-ax630c/stable 0.4 arm64
llm-model-sherpa-ncnn-streaming-zipformer-20m-2023-02-17/stable,now 0.2 arm64 [installed]
llm-model-sherpa-ncnn-streaming-zipformer-zh-14m-2023-02-23/stable,now 0.2 arm64 [installed]
llm-model-sherpa-onnx-kws-zipformer-gigaspeech-3.3m-2024-01-01/stable,now 0.3 arm64 [installed]
llm-model-sherpa-onnx-kws-zipformer-wenetspeech-3.3m-2024-01-01/stable,now 0.3 arm64 [installed]
llm-model-silero-vad/stable,now 0.4 arm64 [installed]
llm-model-single-speaker-english-fast/stable 0.3 arm64
llm-model-single-speaker-fast/stable 0.3 arm64
llm-model-smolvlm-256m-ax630c/stable 0.4 arm64
llm-model-smolvlm-500m-ax630c/stable 0.4 arm64
llm-model-whisper-base/stable 0.4 arm64
llm-model-whisper-small/stable 0.4 arm64
llm-model-whisper-tiny/stable,now 0.4 arm64 [installed]
llm-model-yolo11n-hand-pose/stable 0.3 arm64
llm-model-yolo11n-pose/stable,now 0.3 arm64 [installed]
llm-model-yolo11n-seg/stable,now 0.3 arm64 [installed]
llm-model-yolo11n/stable,now 0.2 arm64 [installed]
Update the latest software package
apt install lib-llm llm-sys

Output list
root@m5stack-LLM:~# apt install lib-llm llm-sys
Reading package lists... Done
Building dependency tree... Done
Reading state information... Done
Reinstallation of lib-llm is not possible, it cannot be downloaded.
The following packages will be upgraded:
llm-sys
1 upgraded, 0 newly installed, 0 to remove and 161 not upgraded.
Need to get 377 kB of archives.
After this operation, 0 B of additional disk space will be used.
Do you want to continue? [Y/n] y
Get:1 https://repo.llm.m5stack.com/m5stack-apt-repo jammy/ax630c arm64 llm-sys arm64 1.6 [377 kB]
Fetched 377 kB in 2s (224 kB/s)
debconf: delaying package configuration, since apt-utils is not installed
(Reading database ... 60311 files and directories currently installed.)
Preparing to unpack .../archives/llm-sys_1.6_arm64.deb ...
Removed /etc/systemd/system/multi-user.target.wants/llm-sys.service.
Unpacking llm-sys (1.6) over (1.6) ...
Setting up llm-sys (1.6) ...
Created symlink /etc/systemd/system/multi-user.target.wants/llm-sys.service → /lib/systemd/system/llm-sys.service.
SD Card Upgrade
For Windows host computer
Prepare a 16GB or larger SD card and format it to FAT32.

Download the latest software packages and model packages from the official website.
Note
Always include the latest versions of the lib-llm and llm-sys packages when performing an upgrade.
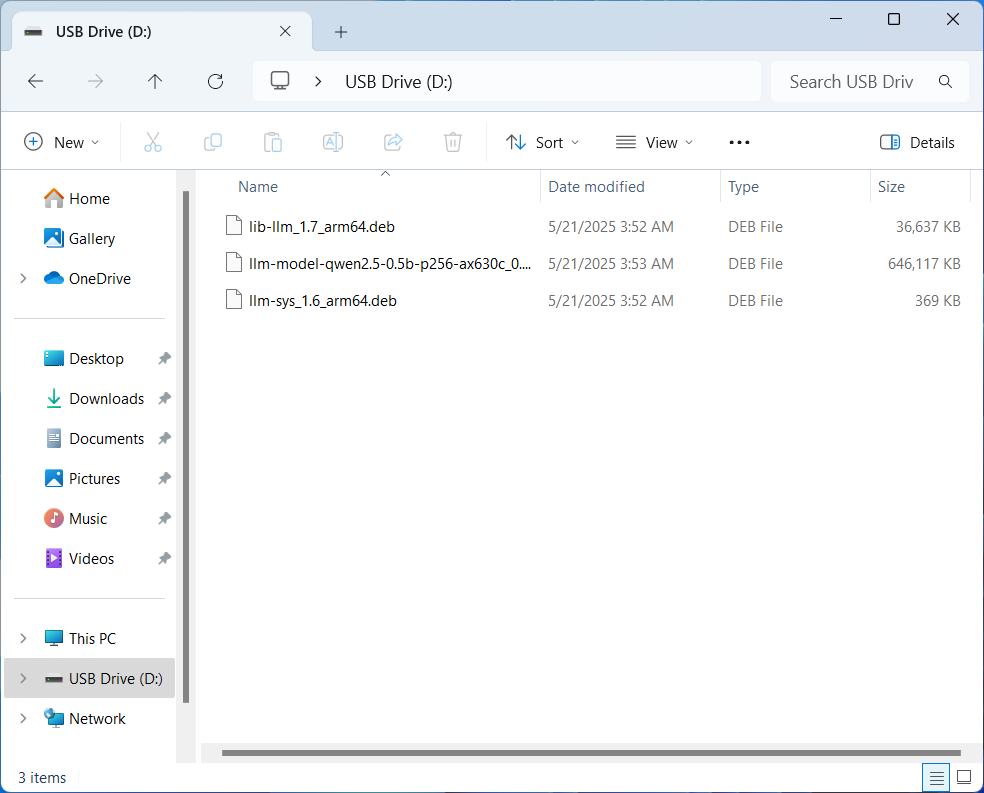
Create a new file named m5stack_update.config, and write the name of the software package into it.

Insert the SD card into the MLLModule KIT.
Note
During the upgrade process, the LED will flash blue. It will turn green if the upgrade is successful, or red if it fails. You can check the upgrade log in the m5stack_update.config.update.log file.
For Mac host computer
Prepare a 16GB or larger SD card and format it to FAT32.

Download the latest software packages and model packages from the official website.
Note
Always include the latest versions of the lib-llm and llm-sys packages when performing an upgrade.

Create a new file named m5stack_update.config, and write the name of the software package into it.


Insert the SD card into the MLLModule KIT.
Note
During the upgrade process, the LED will flash blue. It will turn green if the upgrade is successful, or red if it fails. You can check the upgrade log in the m5stack_update.config.update.log file.
For Linux host computer
Prepare a 16GB or larger SD card and format it to FAT32.

Download the latest software packages and model packages from the official website.
Note
Always include the latest versions of the lib-llm and llm-sys packages when performing an upgrade.

Create a new file named m5stack_update.config, and write the name of the software package into it.

Insert the SD card into the MLLModule KIT.
Note
During the upgrade process, the LED will flash blue. It will turn green if the upgrade is successful, or red if it fails. You can check the upgrade log in the m5stack_update.config.update.log file.
Appendix
Install ADB
For Windows host computer
Download the ADB driver. Click here to download ADB.

Unzip the downloaded file and copy the platform-tools path.

Open the Setting window and select System. Select About and click on Advanced system settings.

Open the Environment Variables window and add the platform-tools path to the Path variable.


For Mac host computer
Download the ADB driver. Click here to download ADB.

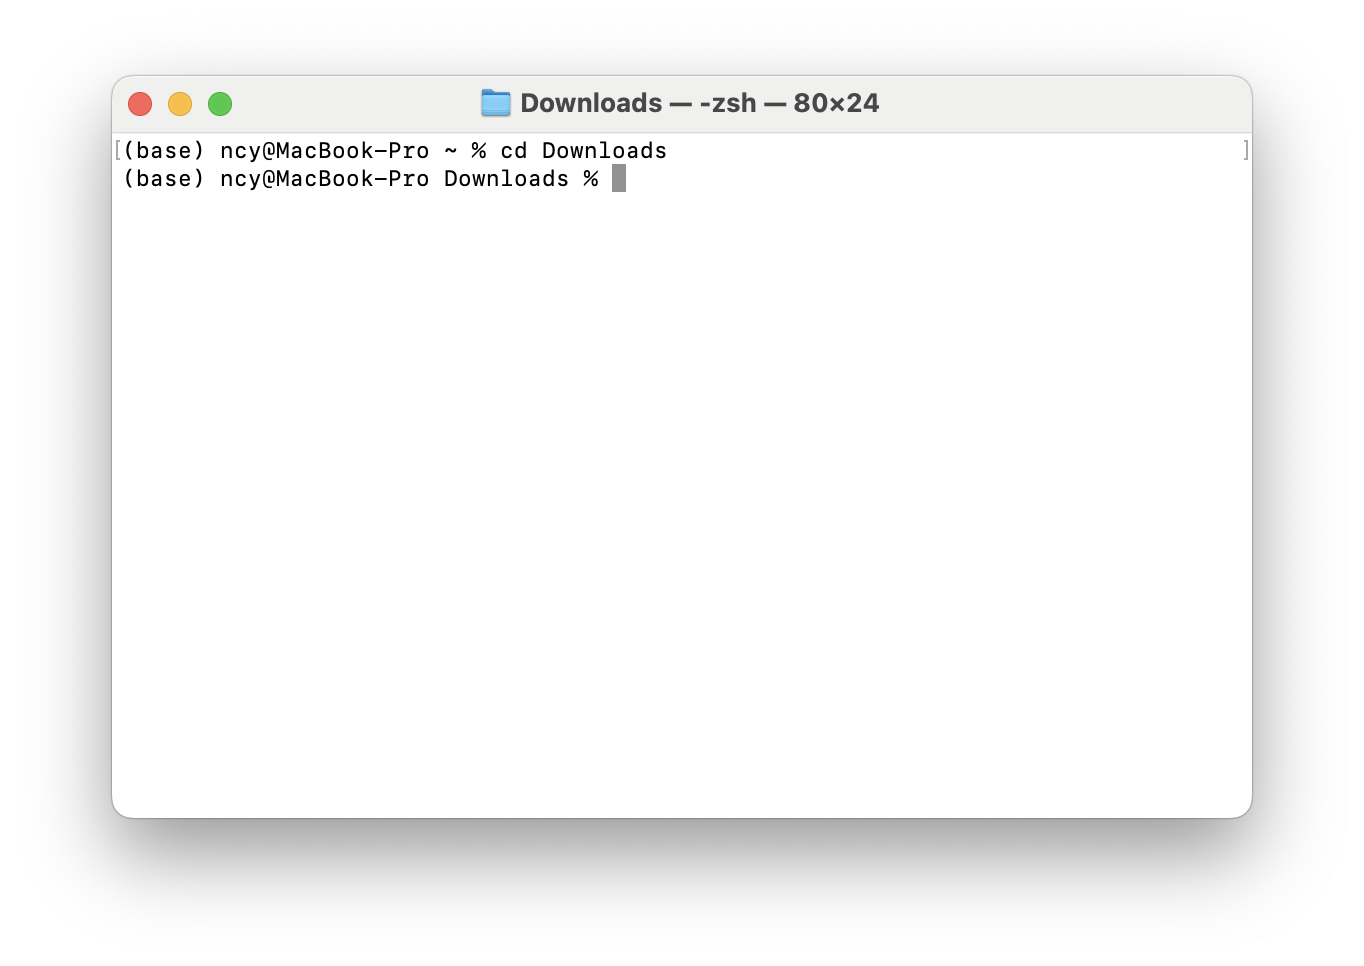
Open the Terminal and use the cd command to navigate to the Downloads directory.
cd ~/Downloads
Use the mkdir -p ~/.android-sdk-macosx command to create a new directory.
mkdir -p ~/.android-sdk-macosx
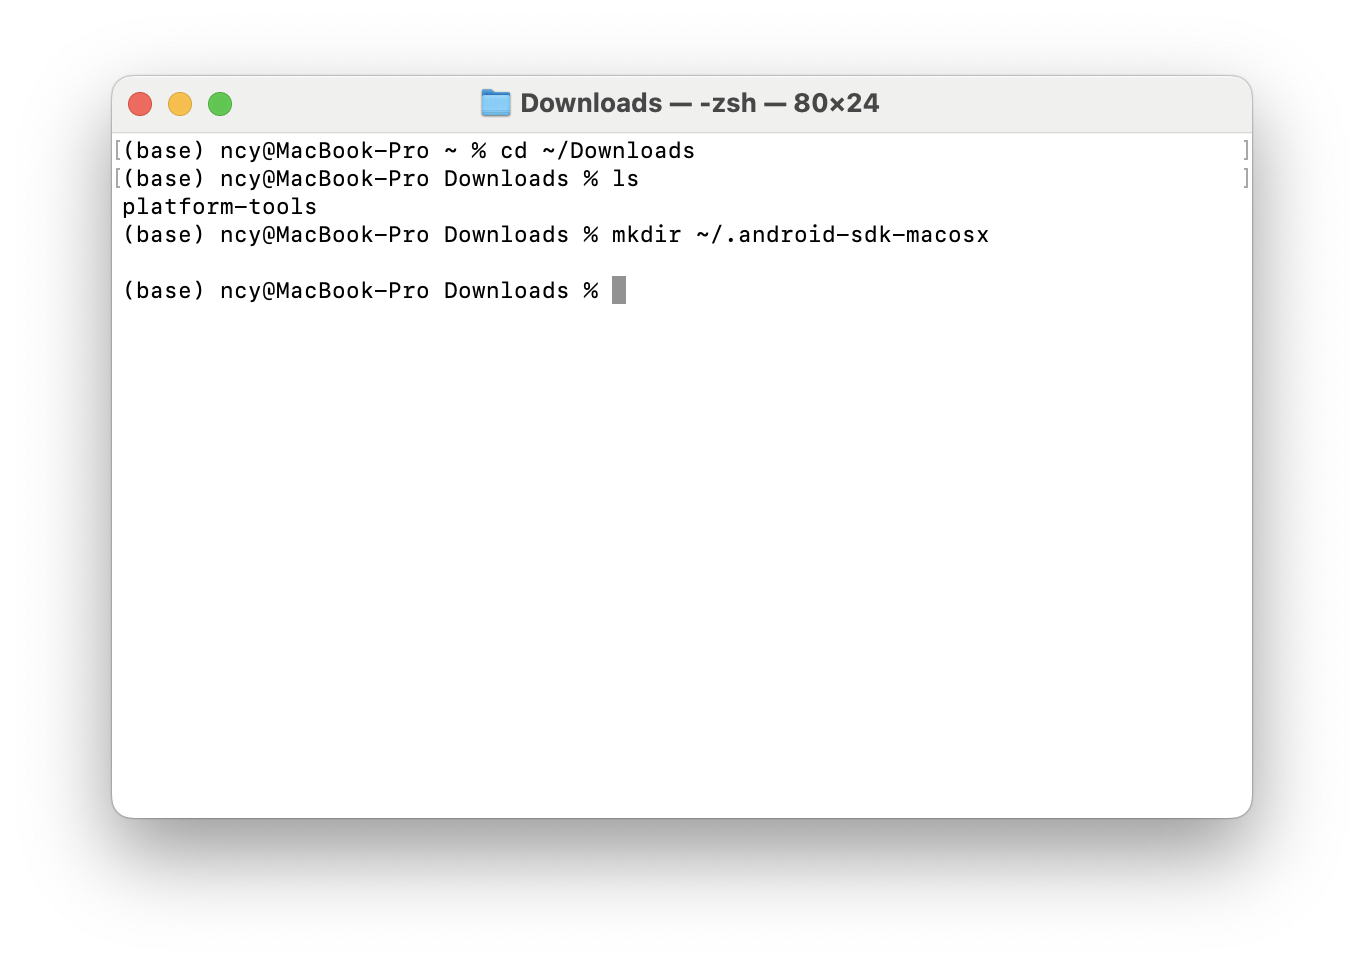
Use the mv platform-tools ~/.android-sdk-macosx command to move the platform-tools directory to the new directory.
mv platform-tools ~/.android-sdk-macosx

Use the echo ‘export PATH=$PATH:~/.android-sdk-macosx/platform-tools’ >> ~/.zshrc command to add the platform-tools directory to the system path.
echo 'export PATH=$PATH:~/.android-sdk-macosx/platform-tools' >> ~/.zshrc

Use the source ~/.zshrc command to refresh the system path.
source ~/.zshrc

For Linux host computer
Open the Terminal and use the sudo apt install google-android-platform-tools-installer command to install the ADB driver.
sudo apt install google-android-platform-tools-installer
